
We love nothing more than running across a fantastic coffee shop like our favorites in Cannon Beach. However, we have to admit that camping coffee just tastes better. It might be the fresh air, the beautiful scenery, or the peace of enjoying a tasty cup of joe without your usual morning responsibilities looming. Whatever the reason, there’s nothing like a brew in the great outdoors — but it can be hard to get coffee right when you’re 50 miles from the nearest Starbucks.
Luckily, it’s easy to brew the perfect cup of camping coffee if you do a little preparation ahead of time. With the right camping coffee maker, good beans, and a bit of dedication, you can start creating wilderness memories from the moment you wake up in the tent.
Disclosure: This post may contain affiliate links. If you make a purchase through one of these links, I may earn a small commission at no additional cost to you. Thanks for keeping Miles with McConkey going!
8 Ways To Brew Camping Coffee
We’ve arranged these in rough order from least to most energy-intensive. Whether you’ve got high standards or just need a caffeine fix, there’s a camping coffee method here for you.
Throughout the list, we’ll assume you brought coffee grounds instead of beans, but all the procedures are the same if whole beans are more your speed — just add a grinding step to the beginning of each one. Consult our ultimate camping checklist before setting off to ensure you’ve left nothing behind.
Instant Coffee
When you want coffee without fuss, there’s nothing wrong with instant. You only need a few packets of instant coffee powder, a drinking mug, and a pot with a heat source to boil water.
The steps couldn’t be simpler. Just fill the pot with enough water for everyone and heat it until it’s just below boiling (that’s important — even when you’re using instant, 212 degrees Fahrenheit is hot enough to burn your coffee). While it heats, pour the instant powder into your mug at your preferred ratio. Two cups of water per packet produces a good, strong drink.
Once your water is hot (but not boiling), pour it into the mug. Swirl the mug a few times to stir, let it sit for a minute or so, and enjoy! And since you didn’t put anything but water in the pot, cleanup is as simple as tossing the packet in your garbage bag.
Coffee Bags
Did you know there are coffee bags as well as tea bags? It’s true! It’s not just Folgers, either. Brands like High Side Coffee and Steeped make coffee bags that are both convenient and sustainable, made entirely of biodegradable materials.
A coffee bag works exactly the same as a tea bag. Just put one in a cup and fill the cup with near-boiling water. We recommend steeping it for a little longer than you would spend to let instant coffee dissolve — it can come out a little weak otherwise.
Cowboy Coffee
If you forgot to pack your coffee maker before the trip or don’t feel like lugging a percolator out to the campground, you may enjoy making coffee the way our pioneer ancestors did. All you need is a pot, a heat source, and coffee grounds. You can also start with whole beans if you’re willing to bring a grinder. If you don’t have one, these single dose grinders are a great way to get started.
The trick is to start cold; your coffee grounds will disperse more evenly through the water. Fill your pot with water, grind your beans (if using whole beans), then add the grounds to the water. Start your heat source and heat the water until near boiling, then simmer the brew until strong. Be careful; cowboy coffee can turn out sludgy if you’re not vigilant.
Once it’s ready, you just have to remove the grounds. You can strain the coffee or skim them off the top with a spoon — the true cowboy method. Alternatively, you can wait a few minutes for the grounds to settle, then scoop coffee out of the pot with your drinking mug. To clean up, just pour out the grounds, since they’re biodegradable.
Pour-Over Coffee
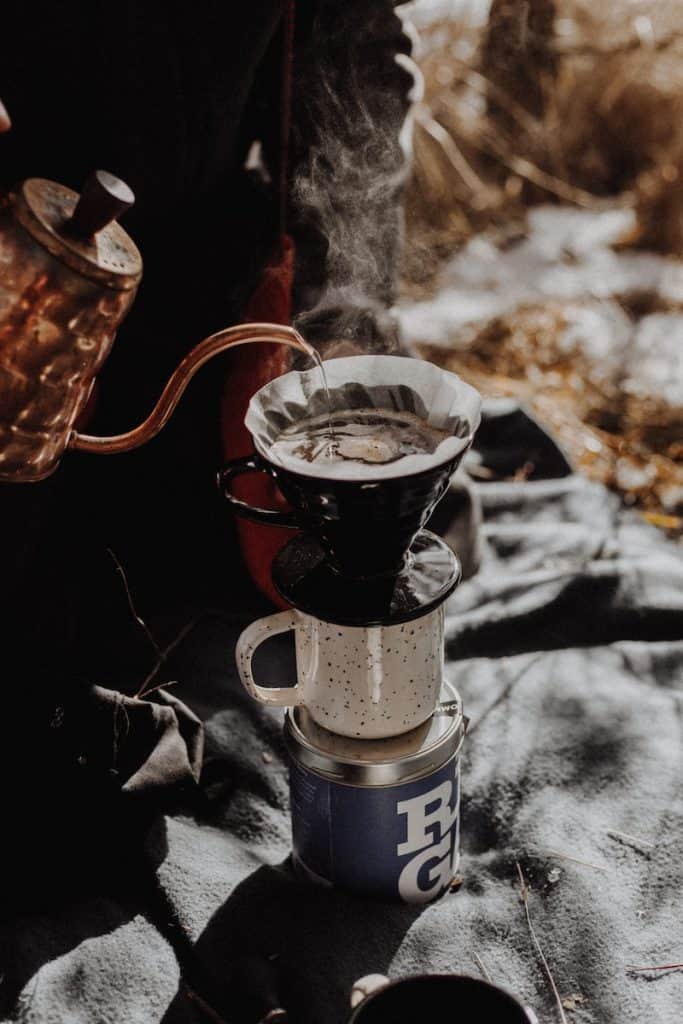
If you’re a java fanatic and don’t mind spending a little more time, you can make your camping coffee the same way baristas do: with a pour-over and filters. This method features the optimal amount of water-to-bean contact and often makes more flavorful coffee than any other. You can use the pour-over method on a single cup or fill a carafe for your whole group to enjoy.
In addition to a water pot, a heat source, and coffee ground fine to medium, you’ll need a portable pour-over stand that fits in your pack. Pick a collapsible or lightweight model that works for you, and grab enough filters for the trip. It also helps to have a ladle or kettle to pour the hot water more easily.
To get started at the campsite:
- Set up the pour-over stand over your mug or carafe.
- Start your heat source and heat enough water to make all the coffee you and your group will want.
- Take a filter, get it damp in the heating water, then place it in the stand.
- Fill the filter with one or two tablespoons of grounds, depending on your desired strength.
When the water is hot, take about a quarter cup and pour it gently over the grounds to get them nice and wet. Wait until the water has all seeped through, then continue pouring more water in short bursts. Each time you add water, wait for it to seep through the grounds before adding more. Keep going until all the water is gone.
It takes a while, but your patience will be rewarded with a flavor reminiscent of your favorite cafe. For a real pro barista move, pour the water in a gentle swirl each time, keeping the grounds evenly rotated.
French Press

Chances are, if you’re serious about coffee, you already know how a French press works. This popular method uses a plunger to squeeze the grounds out of the coffee, resulting in a smooth drink with a unique flavor and texture.
The other great thing about a French press is that you can take one practically anywhere — we’ve even heard of climbers using them while camping halfway up cliff faces. As long as you’ve got medium-ground coffee and a way to heat water, you can enjoy French press coffee from the mountains to the beach.
The process is easy. Just take the plunger out of your French press and add 1-2 tablespoons of grounds, then fill the cylinder with hot water. Replace the plunger, wait 4-6 minutes, then slowly press it down until all the coffee grounds are crushed underneath it. Don’t forget to clean the press between uses; nothing is worse than stale grounds in your cup.
AeroPress
An AeroPress is a combination of a drip stand and an inverted French press. It’s a cylinder you place atop a cup of coffee, then add grounds and a little water. You then use air pressure to strain the liquid through the grounds a little bit at a time. This results in a highly concentrated espresso, which you can drink straight or dilute with hot water for a campsite Americano.
AeroPress is a little more involved, as you need to keep track of three separate components, but it offers you a lot of control. Markings on the cylinder make it easy to portion out servings, and if your group has eclectic tastes, everyone can get the strength they want. Just remember that you’ll still need a way to heat water. If you want more details, check out this AeroPress review.
Coffee Percolator
Using a percolator is a bit old-fashioned and rewards diligence — this isn’t a method for those who want their camping coffee fast. However, it’s a godsend for large groups (around 8-12), especially on trips with a stationary campsite.
In addition to your pot and heat source, you’ll need a percolator and some coarse coffee grounds. Remove the metal filter and fill it about halfway with grounds. Fill the percolator about halfway with cold water. Replace the filter on its tube stand in the kettle apparatus, then heat the whole thing over a medium flame until water bubbles up through the tube.
When you see boiling, remove the percolator from heat and let it sit for another 5 or 10 minutes. While you wait, the water boils up through the tube and then condenses back down through the grounds. This “steeps” the coffee without ever dunking the grounds in the liquid. Percolators require careful attention, but they’re a great way to brew a big batch of coffee with retro flair.
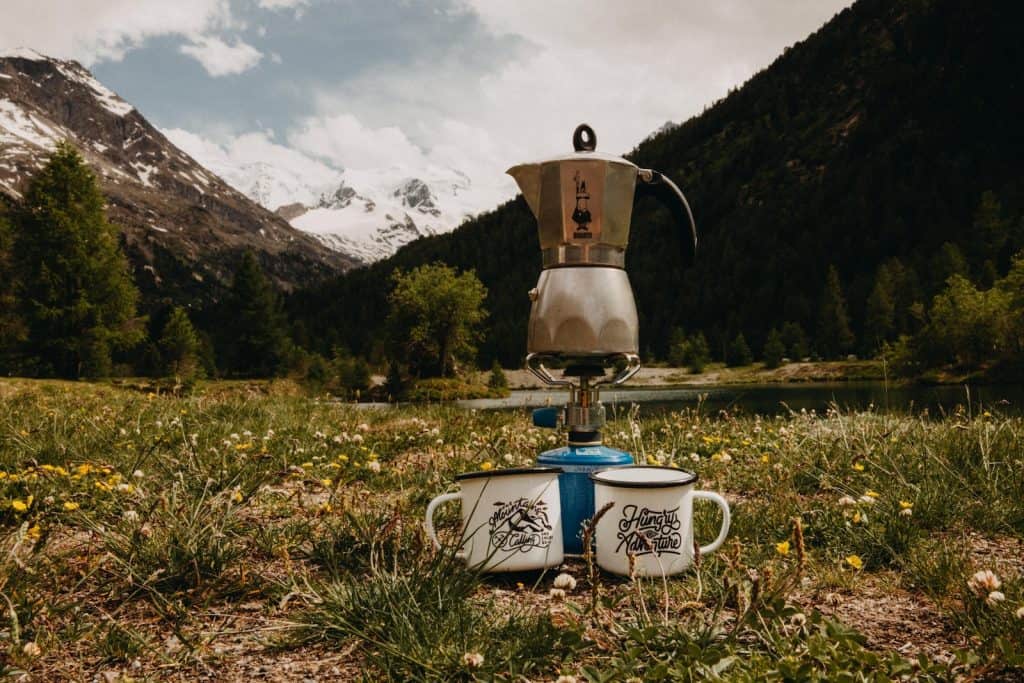
Espresso Pot
Go with a three-part espresso maker like the classic Moka Pot for super-concentrated camping coffee that wakes you up fast. Hot water goes in the bottom and coffee grounds in the middle. Put the espresso pot on your camp stove and heat it low and slow. As the water warms and mixes with the coffee, golden espresso seeps into the upper chamber, ready to serve.
Thanks for reading! If you’re more of a city-dweller but still love to taste new coffee, why not plan a trip to Asheville, NC, and tour its top cafes?
Featured image credit: Leslie Cross
More Articles from Miles with McConkey